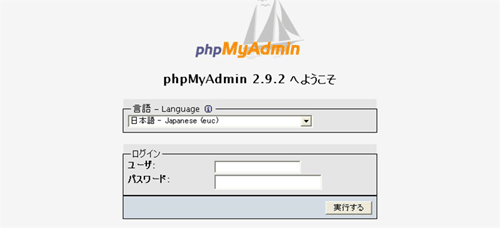
phpMyAdmin は PHP を使ってブラウザ上から MySQL のデーターベースを操作、管理するためのツールです。
phpMyAdmin を利用するためには Apache と PHP のインストールが完了している必要があります。
The phpMyAdmin Project から phpMyAdmin のソースファイルをダウンロードしてインストールする方法を紹介します。
phpMyAdmin のダウンロードとインストール
phpMyAdmin のソースファイルを The phpMyAdmin Project からダウンロードします。

ダウンロードしたソースファイルを展開します。

# tar xzf phpMyAdmin-2.9.2.tar.gz

# mv phpMyAdmin-2.9.2-all-languages /virtual/honana.com/public_html/myadmin

Apache をユーザー権限で実行している場合は、phpMyAdmin ディレクトリの所有者を Apache を実行するユーザーに変更します。

phpMyAdmin の設定
phpMyAdmin の設定は config.inc.php ファイルを使って行います。
設置した時点では設定ファイルが存在しないのでソースファイルから雛形をコピーして使用します。

# cp libraries/config.default.php config.inc.php

コピーした設定ファイルを以下のように編集します。

/**
* The ‘cookie’ auth_type uses blowfish algorithm to encrypt the password. If
* at least one server configuration uses ‘cookie’ auth_type, enter here a
* passphrase that will be used by blowfish. The maximum length seems to be 46
* characters.
*/
$cfg[‘blowfish_secret’] = ‘**********’;下の設定でクッキーを使った認証を有効にした場合に必要となるパスワードを暗号化(blowfish アルゴリズム)するために使用するパスフレーズを入力(適当な文字列)
71 行目辺り
$cfg[‘Servers’][$i][‘auth_type’] = ‘cookie’; // Authentication method (valid choices: config, http, HTTP or cookie)デフォルトの設定(config.inc.php にパスワードを記述)をクッキーを使って認証する方法に変更
以下省略
Apache の設定
Apache の設定ファイル httpd.conf ファイルを編集してエイリアスの設定を行います。

DirectoryIndex index.php
Allow from 192.168.0
</Directory>
Apache の再起動
Apache の設定ファイルを変更した後は Apache を再起動する必要があります。

MySQL サーバーに接続
ウェブブラウザを使って http://honana.com/myadmin のようにアクセスして phpMyAdmin にログインします。

